<body><script type="text/javascript"> function setAttributeOnload(object, attribute, val) { if(window.addEventListener) { window.addEventListener('load', function(){ object[attribute] = val; }, false); } else { window.attachEvent('onload', function(){ object[attribute] = val; }); } } </script> <div id="navbar-iframe-container"></div> <script type="text/javascript" src="https://apis.google.com/js/platform.js"></script> <script type="text/javascript"> gapi.load("gapi.iframes:gapi.iframes.style.bubble", function() { if (gapi.iframes && gapi.iframes.getContext) { gapi.iframes.getContext().openChild({ url: 'https://www.blogger.com/navbar.g?targetBlogID\x3d6418452\x26blogName\x3dFootsteps+on+Clouds\x26publishMode\x3dPUBLISH_MODE_BLOGSPOT\x26navbarType\x3dBLACK\x26layoutType\x3dCLASSIC\x26searchRoot\x3dhttps://chirayu.blogspot.com/search\x26blogLocale\x3den_US\x26v\x3d2\x26homepageUrl\x3dhttp://chirayu.blogspot.com/\x26vt\x3d-4198601941058342502', where: document.getElementById("navbar-iframe-container"), id: "navbar-iframe", messageHandlersFilter: gapi.iframes.CROSS_ORIGIN_IFRAMES_FILTER, messageHandlers: { 'blogger-ping': function() {} } }); } }); </script>

Sunday, May 21, 2006

Image Editing: Give an old, faded, weathered, and antique look to images


Give an old and faded look to images with Adobe Photoshop.

Open the image in Adobe Photoshop.
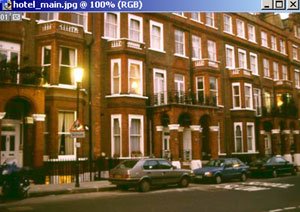
Original image - We will make it look old, faded, and antique with Adobe Photoshop

1. Add a new layer. Layer 1 - Noise

a. New Layer - Noise - Mode Overlay - Fill with overlay neutral color

b. Filter -> Noise -> Add Noise - Amount 9.5% - Gaussian - Monochromatic
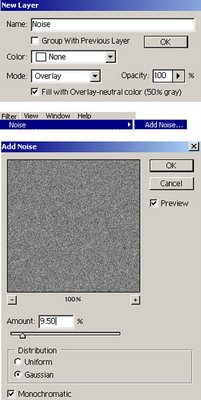
Add a new layer - Noise

2. Add a new layer. Layer 2 - Grain

a. New Layer - Grain - White background color
(Use the keys D+X+Alt+Backspace to get a white background colour for the Clouds layer)
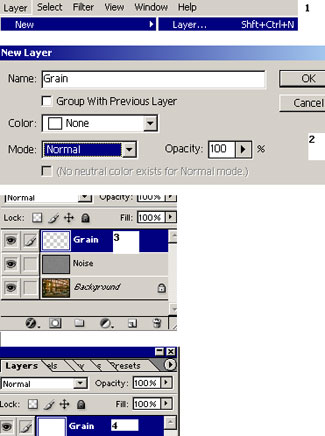
Add a new layer - Grain

b. Filter -> Texture -> Grain - Intensity 75% or more - Contrast 50 to 55% - Grain type - Vertical

c. Layer Blend Mode - Multiply
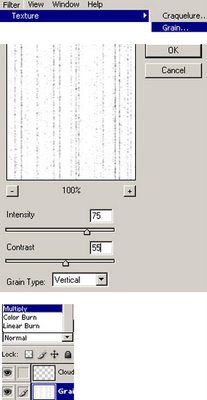
Apply Filter -> Texture -> Grain

3. Add a new layer. Layer 3 - Clouds - Insert between Grain and Noise

a. New Layer - Clouds - White background color
(Use the keys D+X+Alt+Backspace to get a white background colour for the Clouds layer)
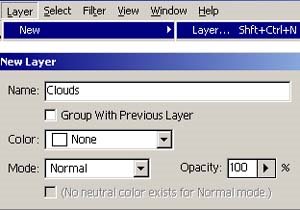
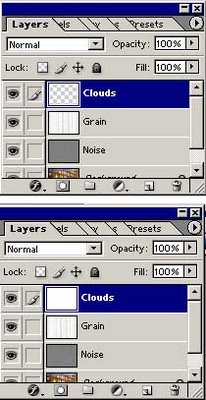
Create a new layer and name it Clouds

Give a white background color to the layer Clouds

b. Filter - > Render -> Difference Clouds

c. Filter -> Pixelate -> Crystallize - Cell size between 25 to 30
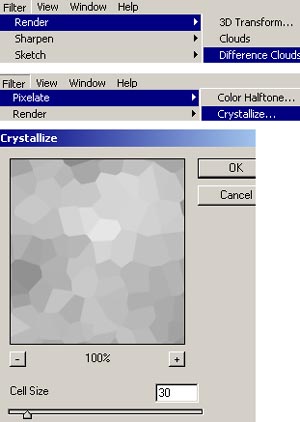
Apply Filters - Render -> Difference Clouds and Pixelate -> Crystallize

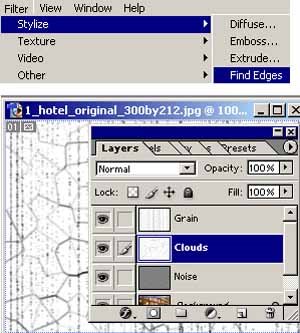
d. Filter -> Stylize -> Find Edges

Apply Stylize -> Find Edges filter to the Clouds layer

e. Layer Blend Mode -> Multiply

Apply Multiply mode to the Clouds layer

4. Give a brownish Hue/Saturation to the Grain layer and save the image.

Here's what it looks like. Compare the original image and the image with a faded, old, weathered, and antique look.
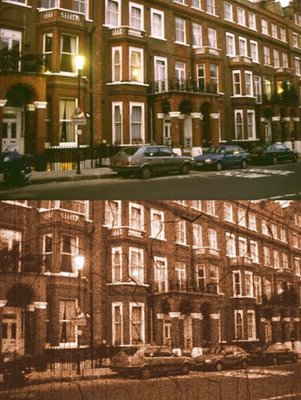
Compare Original image and photoshopped antique, old, faded, and weathered look

Read and watch Adobe Photoshop tutorials on PlanetPhotoshop.