Image Editing: Give Images a Sepia Look
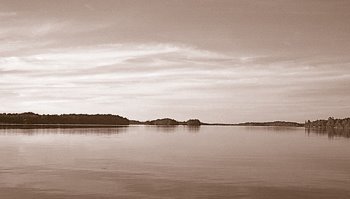
Give your images a 1940s, reddish brown (sepia), look with Adobe Photoshop.
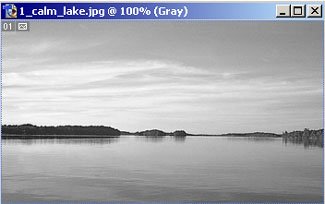
1. Open the image in Adobe Photoshop. 
2. Choose Image -> Mode -> Grayscale
Click OK in the Discard Color Information window to convert the colour photo to a black and white image. 
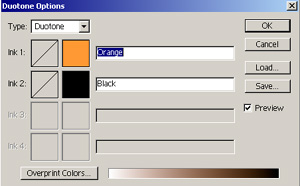
3. Choose Image -> Mode -> Duotone
In the Duotone Options window:
- Select Duotone from the Type dropdown box
- Click the box to the right of Ink1
- Choose an orangish colour from the Color Picker and click OK
- Name Ink1 as Orange
- Click the box to the right of Ink2
- Click Picker button on the right of the Custom Colors window
- Choose black colour from the Color Picker and click OK
- Name Ink2 as Black
- Click OK in the Duotone options window 
4. Choose Image -> Mode -> RGB Color
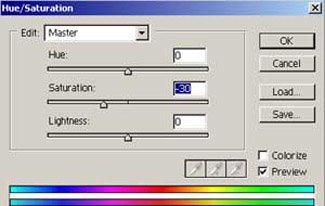
5. Choose Image -> Adjustments -> Hue/Saturation
- Drag the Saturation slider to the left
- Keep the saturation between -30 and -40
- Adjust saturation to give a reddish brown look to the image
6. Save the Sepia-coloured image. 
Read Photoshop tips and tricks on PhotoshopSupport.
Related Image Editing posts on this blog:
- Give an image a faded and weathered look
- Convert a photo to a pencil sketch 
Technorati Tags: Photoshop, Adobe Photoshop, and Image Editing.


<< Home