Photoshop: Give an ice cool look to images
Dabbling with Photoshop on a drizzling Sunday evening. Convert a black and white image to an azure ice cool picture.
1. Open the image in Photoshop.
2. Convert it to grayscale.
2a. Convert grayscale to RGB color.
3. Duplicate layer.
4. Change Hue/Saturation settings.
Image -> Adjustments -> Hue/Saturation
Hue:200, Saturation:0, Lightness:0 (with the Colorize box checked).
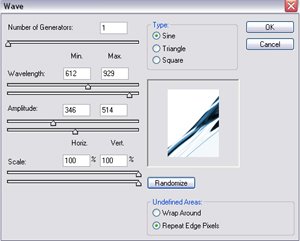
5. Choose Filter -> Distort -> Wave
Set the settings as shown in the image (Figure 1) below. You may click the 'Randomize' button to generate different patterns.
Figure 1: Applying the Wave Filter. Filter -> Distort -> Wave. 
6. Choose Blending Mode as 'Linear Burn'
7. Merge the layers (Ctrl+E)
8. Duplicate the merged layer
9. Change Hue/Saturation settings.
Image -> Adjustments -> Hue/Saturation
Hue:200, Saturation:0, Lightness:0 (with the Colorize box checked).
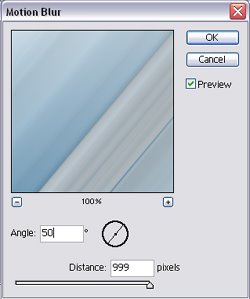
10. Choose Filter -> Blur -> Motion Blur. See image (Figure 2) below.
Figure 2: Applying the Motion Blur filter in Photoshop. Filter -> Blur -> Motion Blur.
11. Choose Blending Mode as Hard Light
12. Save the image as .jpeg with file quality between 10 to 12 for a sharper photo.
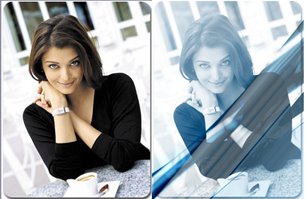
13. Actual and converted images placed side by side.
Figure 3: Give an image an ice cool look with Adobe Photoshop. 
Related Links:
- Original image from Longines.
- Photoshop help from DailyPhotoshop.
Technorati Tags:
- Photoshop, Aishwarya Rai, Ash, and Ice Cool.
Current Music:
~ Rang De Basanti - Roo-ba-roo


<< Home